Category:Armstrong Flight Research Center
NASA aerospace research center in California, USA  Aerial view of the Armstrong Flight Research Center  | |||||
| Upload media | |||||
| Instance of | |||||
|---|---|---|---|---|---|
| Named after |
| ||||
| Location |
| ||||
| Headquarters location | |||||
| Inception |
| ||||
| official website | |||||
 | |||||
See the picture gallery of the Armstrong Flight Research Center.
Subcategories
This category has the following 11 subcategories, out of 11 total.
Media in category "Armstrong Flight Research Center"
The following 137 files are in this category, out of 137 total.
-
"Miniature Aces" NASA's Dale Reed Flight Research Laboratory (AFRC-2015-10946).webm 6 min 39 s, 1,920 × 1,080; 612.25 MB
-
Active Aeroelastic Wing time lapse.ogv 45 s, 640 × 480; 18.61 MB
-
 AFRC logo.png 1,130 × 1,128; 249 KB
-
 AFRC2020-0132-017 - ARC researchers monitor data.jpg 6,156 × 4,108; 15.24 MB
-
 AFRC2020-0132-019 - ARC researchers Yasmin Arbab and Mark Snycerski.jpg 6,612 × 4,455; 16.92 MB
-
 Center Director David Scott Dryden Dedication (ECN-5137).jpg 4,100 × 4,750; 16.55 MB
-

-
 Crew Transport Vehicle at Edwards Air Force Base (1991).jpg 627 × 432; 37 KB
-
 Cx frontal d'une camionnette, Dryden.png 940 × 744; 380 KB
-
 DFRC mission control during X-29 test flight (EC89-0300-1).jpg 3,030 × 2,398; 5.58 MB
-
 Doohan James NASA 19670413.jpg 2,022 × 2,528; 819 KB
-
 Star Trek Cast and Crew Visit NASA Dryden in 1967 (Doohan).jpg 3,604 × 3,604; 5.98 MB
-
 Dream Chaser arrives at Dryden.3.jpg 3,000 × 2,054; 3.05 MB
-
 Dryden - Lageplan.png 297 × 400; 14 KB
-
 Dryden Aerospike Rocket Test (4858567714) (2).jpg 1,035 × 1,536; 353 KB
-
 Dryden Aerospike Rocket Test (4858567714).jpg 2,022 × 3,000; 5.09 MB
-
 Dryden AFB Compass Rose.jpg 1,280 × 948; 391 KB
-
 Edw-nasa-747-041103-01.jpg 2,560 × 1,920; 1.27 MB
-
 Elizabeth “Liz” Ruth, Armstrong Flight Research Center official photo.jpg 1,050 × 1,313; 251 KB
-
-
-
 F-16XL SLFC.jpg 2,000 × 1,598; 988 KB
-
 Fitzhugh Fulton NASA Research Pilot.jpg 226 × 260; 16 KB
-

-
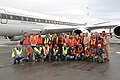
 Flight Research Pilots DVIDS832293.jpg 3,000 × 2,400; 504 KB
-
 Goodbye1274.jpg 3,932 × 3,877; 5.5 MB
-
 Hoisting X-36.jpg 2,000 × 1,720; 560 KB
-
-

-
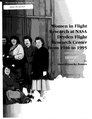
 Human computers - Dryden.jpg 1,150 × 900; 135 KB
-
 Hyper III, M2-F2 & RC Mothership - GPN-2000-000241.jpg 3,030 × 2,366; 9.22 MB
-
 Jfader dryden.jpg 1,280 × 948; 1.04 MB
-
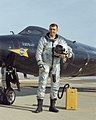 Joe Engle X-15 pilot.jpg 2,770 × 3,458; 2.2 MB
-
 Star Trek Cast and Crew Visit NASA Dryden in 1967 (Kelley 1).jpg 3,639 × 3,639; 6.14 MB
-
 Star Trek Cast and Crew Visit NASA Dryden in 1967 (Kelley 2).jpg 3,590 × 3,590; 6.29 MB
-
 Laurie Grindle.jpg 320 × 400; 43 KB
-
 Load test of brake system - NARA - 12042753.jpg 2,500 × 2,462; 1.41 MB
-
 Load test of brake system - NARA - 12042755.jpg 2,500 × 2,515; 1.55 MB
-
 Load test of brake system - NARA - 12042757.jpg 2,500 × 2,505; 1.16 MB
-
 Load test of brake system - NARA - 12042759.jpg 2,500 × 2,465; 1.31 MB
-
 Load test of brake system - NARA - 12042761.jpg 2,500 × 2,492; 1.47 MB
-

-

-

-

-
 Models on Lakebed with Research Staff DVIDS834830.jpg 3,000 × 2,376; 959 KB
-
 NACA Groundbreaking Ceremony (E-908).jpg 5,100 × 4,000; 9.02 MB
-
 NASA Armstrong Awards 2023 Scholarship (AFRC2023-0120-03).jpg 4,831 × 3,221; 8.62 MB
-
 NASA Armstrong Builds Aircraft to be an Atmospheric Probe (AFRC2023-0193-19).jpg 6,880 × 4,587; 23.58 MB
-
 NASA Armstrong Builds Aircraft to be an Atmospheric Probe (AFRC2023-0193-27).jpg 6,362 × 4,241; 21.37 MB
-
 NASA Armstrong Builds Aircraft to be an Atmospheric Probe (AFRC2023-0193-31).jpg 6,303 × 4,203; 21.8 MB
-
 NASA Armstrong Builds Aircraft to be an Atmospheric Probe (AFRC2023-0193-47).jpg 4,353 × 2,902; 9.57 MB
-
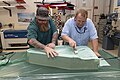
 NASA Armstrong Builds Model Wing (AFRC2023-0157-003).jpg 5,141 × 3,428; 13.35 MB
-
 NASA Armstrong Builds Model Wing (AFRC2023-0157-004).jpg 4,472 × 2,981; 11.34 MB
-
 NASA Armstrong Builds Model Wing (AFRC2023-0157-014).jpg 6,568 × 4,378; 22.82 MB
-
 NASA Armstrong Builds Model Wing (AFRC2023-0157-020).jpg 3,009 × 4,514; 10.94 MB
-
 NASA Armstrong Builds Model Wing (AFRC2023-0157-022).jpg 6,880 × 4,587; 21.53 MB
-
 NASA Armstrong Builds Model Wing (AFRC2023-0157-055).jpg 6,880 × 4,587; 19.3 MB
-
 NASA Armstrong Builds Model Wing (AFRC2023-0157-058).jpg 4,587 × 6,880; 22.37 MB
-
 NASA Armstrong Builds Model Wing (AFRC2023-0157-067).jpg 6,388 × 4,258; 14.86 MB
-
 NASA Armstrong Builds Model Wing (AFRC2023-0157-076).jpg 6,880 × 4,587; 23.84 MB
-
 NASA Armstrong Builds Model Wing (AFRC2023-0157-089).jpg 6,880 × 4,587; 20.32 MB
-
 NASA Armstrong Builds Model Wing (AFRC2023-0157-094).jpg 6,880 × 4,587; 26.29 MB
-
 NASA Armstrong Builds Model Wing (AFRC2023-0157-109).jpg 6,880 × 4,587; 25.88 MB
-
 NASA Armstrong Builds Model Wing (AFRC2023-0157-132).jpg 6,880 × 4,587; 20.82 MB
-
 NASA Armstrong Builds Model Wing (AFRC2023-0157-144).jpg 6,880 × 4,587; 22.72 MB
-
 NASA Armstrong Builds Model Wing (AFRC2023-0157-159).jpg 6,880 × 4,587; 24.9 MB
-
 NASA Armstrong Builds Model Wing (AFRC2023-0157-166).jpg 5,803 × 3,868; 17.46 MB
-
 NASA Armstrong Builds Model Wing (AFRC2023-0157-168).jpg 6,039 × 4,026; 16.16 MB
-
 NASA Concludes Wind Study (AFRC2023-0135-01).jpg 6,021 × 4,014; 14.89 MB
-
 NASA Concludes Wind Study (AFRC2023-0135-03).jpg 5,677 × 3,784; 14.36 MB
-
 NASA Concludes Wind Study (AFRC2023-0135-08).jpg 5,880 × 3,920; 16.78 MB
-
 NASA Concludes Wind Study (AFRC2023-0135-09).jpg 5,867 × 3,911; 14.22 MB
-
 NASA Concludes Wind Study (AFRC2023-0135-14).jpg 6,194 × 4,129; 13.31 MB
-
 NASA Concludes Wind Study (AFRC2023-0135-17).jpg 5,360 × 3,573; 9.7 MB
-
 NASA Concludes Wind Study (AFRC2023-0135-18).jpg 4,977 × 3,318; 8.62 MB
-
 NASA Concludes Wind Study (AFRC2023-0135-25).jpg 5,126 × 3,418; 10.52 MB
-
 NASA Concludes Wind Study (AFRC2023-0135-31).jpg 5,583 × 3,722; 11.18 MB
-
 NASA Concludes Wind Study (AFRC2023-0135-32).jpg 6,877 × 4,584; 17.67 MB
-
 NASA Concludes Wind Study (AFRC2023-0135-33).jpg 5,492 × 3,661; 14.53 MB
-
 NASA Concludes Wind Study (AFRC2023-0135-34).jpg 5,314 × 3,543; 13.37 MB
-
 NASA Concludes Wind Study (AFRC2023-0135-42).jpg 4,848 × 3,232; 11.73 MB
-
 NASA Concludes Wind Study (AFRC2023-0135-43).jpg 5,037 × 3,358; 14.16 MB
-
 NASA Concludes Wind Study (AFRC2023-0135-45).jpg 5,831 × 3,888; 12.43 MB
-
 NASA Concludes Wind Study (AFRC2023-0135-47).jpg 5,121 × 3,414; 9.27 MB
-

-
 NASA Dryden Flight Research Facility Aerial 1992.jpg 3,030 × 2,606; 9.73 MB
-
 NASA ER-2 Pilot Prepares for Flight.jpg 5,507 × 3,671; 10.84 MB
-
 NASA staffperson hug.jpg 500 × 402; 56 KB
-
 NASA’s ER-2 aircraft deploys for ALOFT mission (AFRC2023-0104-07).jpg 5,868 × 3,912; 10.43 MB
-
 NASA’s ER-2 instrument prepared for flight (AFRC2022-0059-14).jpg 6,863 × 4,575; 18.03 MB
-
 NASA’s ER-2 No.806 Returns to Flight 1.jpg 6,370 × 4,247; 13.46 MB
-
 National Campaign Work Area Aerial Images (AFRC2021-0153-25).jpg 7,979 × 5,319; 23.99 MB
-
 National Campaign Work Area Aerial Images (AFRC2021-0153-30).jpg 7,977 × 5,318; 27.57 MB
-
 NAVAIR FA-18E Undergoes Loads Testing at NASA Armstrong (AFRC2021-0159-10).jpg 8,256 × 5,504; 30.05 MB
-
 Navajo Code Talker Joe Morris in 2002.jpg 917 × 1,280; 719 KB
-
 Not your average dashboard (7584828272).jpg 2,000 × 1,720; 557 KB
-
 OIB 2011 Ant crew (6302496350).jpg 5,184 × 3,456; 6.89 MB
-
 OrionBPpaintatDryden.jpg 2,997 × 2,251; 1.95 MB
-

-
 Pegasus Rocket Wing and PHYSX Glove Undergoes Stress Loads Testing DVIDS729916.jpg 1,536 × 1,321; 387 KB
-
 Piazza Knows How to Manage the Heat (AFRC2023-0036-03).jpg 5,288 × 4,230; 9.38 MB
-
 Piazza Knows How to Manage the Heat (AFRC2023-0036-20).jpg 6,880 × 4,587; 13.39 MB
-
 Pilot Breathing Assessment Program Prototype JPL Mask with U.S. Air Force Configuration.jpg 3,275 × 4,912; 9.78 MB
-
 Pilot Breathing Assessment Program Prototype JPL Mask with U.S. Navy Configuration.jpg 2,908 × 4,358; 8.65 MB
-
 Pilot Fitz Fulton in CID Simulator.jpg 3,000 × 2,400; 2.12 MB
-
 Prandtl-D Logo.svg 512 × 512; 23 KB
-
Pressure Breathing (afrc-2023-13905-ppb-video-feature).webm 2 min 48 s, 1,920 × 1,080; 155.76 MB
-
 Reagan speaks to NASA crowd 1982.jpg 3,000 × 2,400; 5.12 MB
-
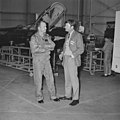
 Research Test Pilots at FRC (ECN-151FRCpilots1962) cropped.jpg 3,999 × 3,148; 4.16 MB
-
 Richard A. Searfoss DVIDS715557.jpg 1,536 × 1,490; 269 KB
-
 Star Trek Cast and Crew Visit NASA Dryden in 1967 (Kelley and Roddenberry).jpg 3,643 × 3,643; 6.29 MB
-
 Star Trek Cast and Crew Visit NASA Dryden in 1967.jpg 3,641 × 3,641; 6.85 MB
-
 STS-26 Welcome Home Ceremony - GPN-2002-000108.jpg 2,929 × 2,308; 1.93 MB
-
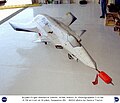
 Takeoff of X-36 first flight.jpg 1,536 × 1,321; 347 KB
-

-

-
 U.S. Air Force Harness Configuration.jpg 3,389 × 5,084; 7.81 MB
-
 U.S. Navy Harness Configuration.jpg 3,265 × 4,897; 7.69 MB
-
 UAVSAR testing at Dryden Flight Research Center (ED06-0200-07).jpg 3,000 × 2,384; 3.54 MB
-
 Uncrating X-36-2.jpg 2,000 × 1,720; 731 KB
-
 Uncrating X-36.jpg 2,000 × 1,720; 636 KB
-
 US-NASA-DrydenFlightResearchCenter-Logo.svg 720 × 715; 2 KB
-
-
 X-15 Pilots - GPN-2000-000143.jpg 1,988 × 1,528; 567 KB
-
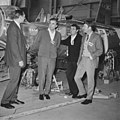
 X-15 pilots clown around (5135053980).jpg 3,000 × 2,348; 3.13 MB
-
 X-31 Engine Fit Check.jpg 3,000 × 2,400; 2.36 MB
-
 X-36 Dryden Hangar.jpg 2,000 × 1,720; 610 KB
-
 X-36 First Flight.jpg 1,536 × 1,321; 273 KB
-
 X-38 - On Ground after First Free Flight, March 12, 1998 DVIDS726732.jpg 3,000 × 2,394; 4.45 MB
-
 X-38 Arrival at NASA Dryden on June 4, 1997 DVIDS684645.jpg 3,030 × 2,335; 7.72 MB
-
 X-38 Being Prepared for Shipment DVIDS713236.jpg 3,000 × 2,367; 3.6 MB
-
 X-38 Being Prepared for Shipment DVIDS718573.jpg 3,000 × 2,364; 4.21 MB
-
 X-38 on Lakebed after Landing on Second Free Flight DVIDS701648.jpg 3,000 × 2,320; 2.86 MB
-

-

-


.jpg)


.jpg)

.jpg)

_(2).jpg)
.jpg)


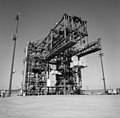
,_RF_tower,_stadium_lights,_and_Shuttle_Hangar_(Building_4833)_on_right._Also_visible_on_right-_concrete_weights_for_proof_load_tests_-_NARA_-_12042867.jpg)
,_RF_tower,_and_Orbiter_Aft_Access_Platform_(1201_Stand)_on_left_-_NARA_-_12042865.jpg)


.jpg)


.jpg)
.jpg)


.jpg)
.jpg)


_at_Armstrong_Flight_Research_Center_in_Edwards,_California_(AFRC2017-0171-03).jpg)
_at_Armstrong_Flight_Research_Center_in_Edwards,_California_(AFRC2021-0029-10).jpg)
_on_right._110_volt_power_cords_and_-2_main_hoist_(obscured,_behind)_on_left._-_NARA_-_12042875.jpg)
_platform_on_40ft_level_that_replaced_stairs_in_center_section_-_NARA_-_12042829.jpg)

.jpg)
.jpg)
.jpg)
.jpg)
.jpg)
.jpg)
.jpg)
.jpg)
.jpg)
.jpg)
.jpg)
.jpg)
.jpg)
.jpg)
.jpg)
.jpg)
.jpg)
.jpg)
.jpg)
.jpg)
.jpg)
.jpg)
.jpg)
.jpg)
.jpg)
.jpg)
.jpg)
.jpg)
.jpg)
.jpg)
.jpg)
.jpg)
.jpg)
.jpg)
.jpg)
.jpg)
.jpg)
.jpg)
.jpg)
_view_from_80_foot_level,_looking_east_with_%27A%27_Platform_in_foreground,_right._Also_visible-_both_SAPs_at_extreme_bottom,_starboard_Main_Hoist_hook_-_DPLA_-_a7027f45d436b9130622568cb81f5025.jpg)


.jpg)
.jpg)

.jpg)
.jpg)
.jpg)

.jpg)
.jpg)


.jpg)
.jpg)


_cropped.jpg)

.jpg)


.jpg)


.jpg)


.jpg)