Category:Citybus Route 37X
| number: | (thirty-seven) |
|---|---|
| Citybus routes in Hong Kong: | 19 · 20 · 22 · 23 · 25 · 37 · 38 · 40 · 48 · 50 · 55 · 56 |
中文:城巴37X線
Media in category "Citybus Route 37X"
The following 51 files are in this category, out of 51 total.
-
 9513 CTB 37X 30-01-2023.jpg 4,032 × 3,024; 2.62 MB
-
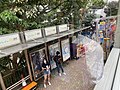
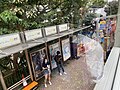
 Admiralty Station bus stop 03-02-2023.jpg 4,032 × 3,024; 3.93 MB
-
 Admiralty Station(East) bus stop 03-02-2023.jpg 4,032 × 3,024; 4.24 MB
-
 Admiralty Station(East) CTB via Aberdeen Tunnel to Southern District bus stop 13-02-2023.jpg 4,032 × 3,024; 3.62 MB
-
 City Hall bus stop 01-03-2023.jpg 4,032 × 3,024; 4.29 MB
-
 Citybus Route 37X.JPG 4,320 × 3,240; 5.53 MB
-
 Citybus9516 37X.jpg 2,748 × 2,545; 2.19 MB
-
 CTB37ABRtMap.png 1,238 × 1,127; 420 KB
-
 HK Aberdeen Promenade CityBus Stops 1.JPG 1,200 × 1,600; 1.14 MB
-
 HK Sheung Wan 上環 evening Shun Tak Centre NWFBus 905 stop signs April-2012.jpg 1,936 × 2,592; 1.99 MB
-
 HK WC 灣仔道 Wan Chai Road March 2022 Px3 41.jpg 3,000 × 4,000; 4.91 MB
-

-

-
 HKU Centennial Campus bus stop 20-12-2022.jpg 4,032 × 3,024; 4.76 MB
-
 Lady Ho Tung Hall bus stop 15-01-2023(1).jpg 4,032 × 3,024; 4.9 MB
-
 Lady Ho Tung Hall bus stop 15-01-2023(2).jpg 4,032 × 3,024; 5.14 MB
-
 Methodist Centre 07-05-2023.jpg 4,032 × 3,024; 3.63 MB
-
 Nam Long Shan Road bus stop 04-02-2023.jpg 4,032 × 3,024; 3.79 MB
-
 Nam Long Shan Road bus stop 20-05-2023.jpg 4,032 × 3,024; 4.09 MB
-
 Nam Long Shan Road bus stop 29-05-2023(2).jpg 4,032 × 3,024; 4.15 MB
-
 Nam Long Shan Road bus stop 29-05-2023.jpg 4,032 × 3,024; 4.07 MB
-
 Pok Fu Lam Village bus stop 29-04-2023(1).jpg 4,032 × 3,024; 4.57 MB
-
 Pok Fu Lam Village bus stop 29-04-2023(2).jpg 4,032 × 3,024; 4.54 MB
-
 Pok Fu Lam Village bus stop 29-04-2023(3).jpg 4,032 × 3,024; 4.67 MB
-
 Pok Fu Lam Village bus stop 29-04-2023(4).jpg 4,032 × 3,024; 5.09 MB
-
 Pok Fu Lam Village bus stop 29-04-2023(5).jpg 4,032 × 3,024; 5.24 MB
-
 Pokfield Road CTB bus stop flag 16-05-2023.jpg 4,032 × 3,024; 5.13 MB
-
 Queen Mary Hospital bus stop 01-03-2023(1).jpg 4,032 × 3,024; 5.57 MB
-
 Queen Mary Hospital bus stop 01-03-2023(2).jpg 4,032 × 3,024; 5.35 MB
-
 Queen Mary Hospital bus stop 02-02-2023.jpg 4,032 × 3,024; 5.03 MB
-
 Queen Mary Hospital bus stop 08-05-2023.jpg 4,032 × 3,024; 5.23 MB
-
 Queen Mary Hospital bus stop 10-04-2023(1).jpg 4,032 × 3,024; 4.71 MB
-
 Queen Mary Hospital bus stop 10-04-2023(2).jpg 4,032 × 3,024; 4.61 MB
-
 Queen Mary Hospital bus stop 18-05-2023.jpg 4,032 × 3,024; 5.37 MB
-
 Queen Mary Hospital bus stop 24-02-2023(1).jpg 4,032 × 3,024; 4.68 MB
-
 Queen Mary Hospital bus stop 24-02-2023(2).jpg 4,032 × 3,024; 4.54 MB
-
 Queen Mary Hospital bus stop 24-03-2023(1).jpg 4,032 × 3,024; 6.53 MB
-
 Queen Mary Hospital bus stop 24-03-2023(2).jpg 4,032 × 3,024; 5.76 MB
-
 Queen Mary Hospital bus stop 28-03-2023(1).jpg 4,032 × 3,024; 5.46 MB
-
 Queen Mary Hospital bus stop 28-03-2023(2).jpg 4,032 × 3,024; 4.65 MB
-
 Queen Mary Hospital bus stop 29-04-2023(1).jpg 4,032 × 3,024; 5.36 MB
-
 Queen Mary Hospital bus stop 29-04-2023(2).jpg 4,032 × 3,024; 5.3 MB
-
 Queen Mary Hospital bus stop 29-04-2023(3).jpg 4,032 × 3,024; 5.4 MB
-
 Queen Mary Hospital bus stop 29-04-2023(4).jpg 4,032 × 3,024; 4.81 MB
-
 Tin Lok Lane bus stop 28-04-2023.jpg 4,032 × 3,024; 3.18 MB
-
 Victory Factory Building bus stop 03-04-2023.jpg 4,032 × 3,024; 3.66 MB
-
 Yu Chun Keung Memorial College No.2 bus stop 13-01-2023.jpg 4,032 × 3,024; 4.12 MB
-
 Yu Chun Keung Memorial College No.2 bus stop 24-04-2023(1).jpg 4,032 × 3,024; 3.85 MB
-
 Yu Chun Keung Memorial College No.2 bus stop 24-04-2023(2).jpg 4,032 × 3,024; 4.24 MB
-
 Yu Chun Keung Memorial College No.2 bus stop 24-04-2023(3).jpg 4,032 × 3,024; 4.56 MB
-
 Yu Chun Keung Memorial College No.2 bus stop 24-04-2023(4).jpg 4,032 × 3,024; 4.87 MB


_bus_stop_03-02-2023.jpg)
_CTB_via_Aberdeen_Tunnel_to_Southern_District_bus_stop_13-02-2023.jpg)


.jpg)
.jpg)


.jpg)

.jpg)
.jpg)
.jpg)
.jpg)
.jpg)

.jpg)
.jpg)


.jpg)
.jpg)

.jpg)
.jpg)
.jpg)
.jpg)
.jpg)
.jpg)
.jpg)
.jpg)
.jpg)
.jpg)


.jpg)
.jpg)
.jpg)
.jpg)