Category:H.M. Wilson Archives
- Website: https://hmwilson.archives.org.au/
- Flickr group: https://www.flickr.com/groups/hmwarchives/
- Usage stats: BaGLAMa 2
- Source template: {{HMW}}
Subcategories
This category has only the following subcategory.
Pages in category "H.M. Wilson Archives"
This category contains only the following page.
Media in category "H.M. Wilson Archives"
The following 200 files are in this category, out of 730 total.
(previous page) (next page)-
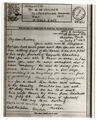
 1852-08-08 Letter from W.S. Hall to his brother Frank, p1.tif 3,270 × 5,214; 30.99 MB
-
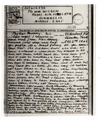
 1852-08-08 Letter from W.S. Hall to his brother Frank, p2.tif 3,392 × 5,225; 31.73 MB
-
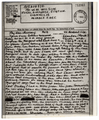
 1895 Galbraith & Co receipt to WS Hall.tif 4,960 × 6,139; 43.59 MB
-
 1895-02-28 Letter to HA Hall, note.png 2,600 × 2,654; 2.29 MB
-
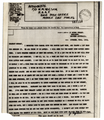
 1895-02-28 Letter to HA Hall, p1.png 9,165 × 7,328; 36.52 MB
-
 1895-02-28 Letter to HA Hall, p2.png 9,128 × 7,384; 36.8 MB
-
 1910 Hall-Lodge wedding announcement.png 2,583 × 1,599; 6.4 MB
-
 1943 Australian and American Nurses, Rae Hussey, New Guinea (cropped).png 3,228 × 2,384; 9.86 MB
-
 1943 Australian and American Nurses, Rae Hussey, New Guinea.png 3,519 × 3,392; 14.63 MB
-
 1945-11-06 Telegram Murray to Margaret Wilson.tif 3,206 × 2,074; 7.6 MB
-
 1945-11-08 Telegram Murray to Margaret Wilson.tif 3,182 × 1,870; 7.07 MB
-
 1945-11-09 Telegram Murray to Margaret Wilson.tif 3,182 × 2,090; 7.71 MB
-
 1945-11-13 Telegram Murray to Margaret Wilson.tif 3,199 × 2,164; 7.93 MB
-
 24 November 1943, airgraph from Jean Agnew to Murray.png 3,574 × 4,224; 68.5 MB
-
 8 Outram Street, back.png 4,048 × 2,464; 15.31 MB
-
 8 Outram Street, rotated and cropped.png 3,740 × 1,837; 9.25 MB
-
 8 Outram Street.png 4,031 × 2,475; 13.67 MB
-
 Airgraph 1943-07-06 Edith to Murray.png 2,636 × 3,264; 10.82 MB
-
 Airgraph 1943-07-22 Jean to Murray.png 2,602 × 3,104; 11.2 MB
-
 Airgraph 1943-08-05 Adele to Murray.png 2,619 × 3,184; 10.76 MB
-
 Airgraph 1943-08-15 Constance to Murray.png 2,570 × 3,296; 11.13 MB
-
 Airgraph 1943-08-26 Edith to Murray.png 2,698 × 3,192; 11.63 MB
-
 Airgraph 1943-08-30 Edith to Murray (verso).png 3,216 × 2,707; 10.93 MB
-
 Airgraph 1943-08-30 Edith to Murray.png 2,689 × 3,200; 12.42 MB
-
 Airgraph 1943-09-06 Edith to Murray.png 3,562 × 4,272; 69.66 MB
-
 Airgraph 1943-09-09 Edith to Murray.png 2,689 × 3,352; 10.1 MB
-
 Airgraph 1943-09-15 Edith to Murray.png 2,704 × 3,472; 11.56 MB
-
 Airgraph 1943-09-30 Edith to Murray.png 2,680 × 3,112; 9.95 MB
-
 Airgraph 1943-10-02 Edith to Murray.png 2,693 × 3,224; 10.39 MB
-
 Airgraph 1943-10-06 Edith to Murray.png 2,619 × 3,184; 11.22 MB
-
 Airgraph 1943-10-11 Edith to Murray.png 2,584 × 3,136; 10.8 MB
-
 Airgraph 1943-10-20 Jean to Murray.png 2,689 × 3,112; 10.15 MB
-
 Airgraph 1943-10-26 Edith to Murray.png 2,597 × 3,120; 9.86 MB
-
 Airgraph 1943-10-29 Jean to Murray.png 2,672 × 3,304; 10.9 MB
-
 Airgraph 1943-11-03 Edith to Murray (letter 12).png 2,691 × 3,104; 10.85 MB
-
 Airgraph 1943-11-03 Edith to Murray (letter 13).png 2,652 × 3,160; 10.35 MB
-
 Airgraph 1943-11-15 Edith to Murray (letter 14 p1).png 2,619 × 3,176; 11.42 MB
-
 Airgraph 1943-11-15 Edith to Murray (letter 14 p2).png 2,619 × 3,168; 10.92 MB
-
 Airgraph 1943-11-15 Edith to Murray (letter 18 p3).png 2,625 × 3,272; 11.01 MB
-
 Airgraph 1943-11-15 Edith to Murray.png 2,637 × 3,272; 10.64 MB
-
 Airgraph 1943-11-23 Edith to Murray (letter 15 p1).png 2,663 × 3,216; 10.98 MB
-
 Airgraph 1943-11-23 Edith to Murray (letter 15 p2).png 2,654 × 3,152; 11.5 MB
-
 Airgraph 1943-11-23 Edith to Murray (letter 15 p3).png 2,649 × 3,176; 10.46 MB
-
 Airgraph 1943-11-28 Adele to Murray.png 2,646 × 3,232; 10.23 MB
-
 Airgraph 1943-11-28 Edith to Murray (letter 16 p1).png 2,654 × 3,168; 10.81 MB
-
 Airgraph 1943-11-28 Edith to Murray (letter 16 p2).png 2,672 × 3,200; 10.5 MB
-
 Airgraph 1943-11-29 Rae to Murray.png 2,671 × 3,120; 10.4 MB
-
 Airgraph 1943-12-07 Jean to Murray.png 2,628 × 3,216; 10.73 MB
-
 Airgraph 1943-12-12 Edith to Murray (letter 17 p1).png 2,655 × 3,288; 11.18 MB
-
 Airgraph 1943-12-12 Edith to Murray (letter 17 p2).png 2,629 × 3,224; 10.92 MB
-
 Airgraph 1943-12-14 Jean to Murray.png 2,654 × 3,184; 10.19 MB
-
 Airgraph 1943-12-15 Edith to Murray (letter 18 p1).png 2,680 × 3,168; 11.08 MB
-
 Airgraph 1943-12-15 Edith to Murray (letter 18 p2).png 2,654 × 3,208; 10.95 MB
-
 Airgraph 1943-12-22 Edith to Murray (letter 19 p1).png 2,619 × 3,192; 10.58 MB
-
 Airgraph 1943-12-22 Edith to Murray (letter 19 p2).png 2,611 × 3,096; 9.88 MB
-
 Airgraph 1943-12-26 Edith to Murray (letter 20 p1).png 2,588 × 3,208; 10.74 MB
-
 Airgraph 1943-12-26 Edith to Murray (letter 20 p2).png 2,689 × 3,112; 10.78 MB
-
 Airgraph 1943-12-26 Edith to Murray (letter 20 p3).png 2,631 × 3,152; 10.66 MB
-
 Airgraph 1943-12-26 Edith to Murray (letter 20 p4).png 2,619 × 3,264; 11 MB
-
 Airgraph 1943-12-30 Adele to Murray.png 2,619 × 3,128; 9.91 MB
-
 Airgraph 1943-12-31 Edith to Murray (letter 20 p2).png 2,637 × 3,224; 10.96 MB
-
 Airgraph 1943-12-31 Edith to Murray (letter 21 p1).png 2,628 × 3,168; 10.94 MB
-
 Airgraph 1944-01-03 Rae to Murray (p1).png 2,609 × 3,280; 10.37 MB
-
 Airgraph 1944-01-03 Rae to Murray (p2).png 2,698 × 3,192; 10.25 MB
-
 Airgraph 1944-01-07 Edith to Murray (letter 22 p1).png 2,628 × 3,072; 10.07 MB
-
 Airgraph 1944-01-07 Edith to Murray (letter 22 p2).png 2,561 × 3,096; 10.16 MB
-
 Airgraph 1944-01-07 Edith to Murray (letter 22 p3).png 2,593 × 3,168; 10.87 MB
-
 Airgraph 1944-01-16 Edith to Murray (letter 22 p1).png 2,584 × 3,040; 10.52 MB
-
 Airgraph 1944-01-16 Edith to Murray (letter 22 p2).png 2,663 × 3,208; 10.87 MB
-
 Airgraph 1944-01-21 Edith to Murray (letter 24 p1).png 2,653 × 3,192; 10.41 MB
-
 Airgraph 1944-01-21 Edith to Murray (letter 24 p2).png 2,619 × 3,200; 10.53 MB
-
 Airgraph 1944-01-23 Edith to Murray (letter 25 p1).png 2,663 × 3,200; 10.58 MB
-
 Airgraph 1944-02-06 Edith to Murray (letter 26 p1).png 2,608 × 3,376; 11.04 MB
-
 Airgraph 1944-02-06 Edith to Murray (letter 26 p2).png 2,654 × 3,296; 11.02 MB
-
 Airgraph 1944-02-16 Jean to Murray.png 2,623 × 3,272; 10.65 MB
-
 Airgraph 1944-02-17 Edith to Murray (letter 27 p1).png 2,628 × 3,160; 10.51 MB
-
 Airgraph 1944-02-20 Edith to Murray (letter 27 p1).png 2,584 × 3,335; 10.24 MB
-
 Airgraph 1944-02-20 Edith to Murray (letter 27 p3).png 2,598 × 3,072; 9.56 MB
-
 Airgraphs to Murray Wilson, envelope cropped.png 2,108 × 464; 1.95 MB
-
 Airgraphs to Murray Wilson, envelope.png 4,024 × 5,186; 28.97 MB
-
 Andover photo set, after shearing 14lb, back.png 3,536 × 2,168; 11.16 MB
-
 Andover photo set, after shearing 14lb, cropped.png 3,243 × 1,878; 7.55 MB
-
 Andover photo set, after shearing 14lb.png 3,480 × 2,139; 9.19 MB
-
 Andover photo set, before shearing, back.png 3,592 × 2,272; 12.48 MB
-
 Andover photo set, before shearing, cropped.png 3,195 × 1,901; 7.47 MB
-
 Andover photo set, before shearing.png 3,574 × 2,282; 10.23 MB
-
 Andover photo set, ewe brought home, back.png 3,656 × 2,304; 13.23 MB
-
 Andover photo set, ewe brought home, cropped.png 3,209 × 1,896; 7.71 MB
-
 Andover photo set, ewe brought home.png 3,558 × 2,266; 10.36 MB
-
 Andover photo set, label.png 3,344 × 3,003; 13.86 MB
-
 Andover photo set, windmill down, back.png 3,656 × 2,216; 11.47 MB
-
 Andover photo set, windmill down, cropped.png 3,321 × 1,863; 8.31 MB
-
 Andover photo set, windmill down.png 3,657 × 2,244; 10.76 MB
-
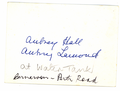
 Aubrey Hall and Aubrey Lamond, water tank on the Carnarvon-Perth road (cropped).png 3,442 × 2,519; 10.46 MB
-
 Aubrey Hall and Aubrey Lamond, water tank on the Carnarvon-Perth road (full).png 4,368 × 3,325; 15.48 MB
-
 Aubrey Hall and Aubrey Lamond, water tank on the Carnarvon-Perth road (verso).png 3,024 × 2,295; 4.44 MB
-
 Aubrey Hall and droving plant, Carnarvon, back.png 3,327 × 1,897; 8.89 MB
-
 Aubrey Hall and droving plant, Carnarvon, cropped.png 2,991 × 1,407; 5.28 MB
-
 Aubrey Hall and droving plant, Carnarvon.png 3,327 × 1,914; 7.96 MB
-
 Aubrey Hall in profile, back.png 3,740 × 2,607; 13.79 MB
-
 Aubrey Hall in profile, cropped.png 2,531 × 2,233; 7.13 MB
-
 Aubrey Hall in profile.png 3,696 × 2,558; 11.62 MB
-
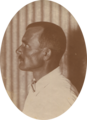
 Aubrey Hall oval portrait, back.png 2,574 × 3,993; 16.04 MB
-
 Aubrey Hall oval portrait, cropped.png 1,958 × 2,696; 6.55 MB
-
 Aubrey Hall oval portrait.png 2,552 × 3,896; 13.33 MB
-
 Aubrey Hall portrait postcard (verso).png 2,206 × 1,424; 3.22 MB
-
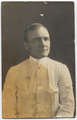
 Aubrey Hall portrait postcard.png 3,208 × 5,055; 16.16 MB
-
 Aubrey Hall portrait, Cossack, back.png 3,388 × 2,178; 11.34 MB
-
 Aubrey Hall portrait, Cossack, black and white crop.png 2,664 × 4,208; 4.4 MB
-
 Aubrey Hall portrait, Cossack.png 2,840 × 4,416; 14.77 MB
-
 Aubrey Hall profile 1920s, back.png 1,997 × 2,662; 8.3 MB
-
 Aubrey Hall profile 1920s, cropped.png 1,820 × 2,512; 5.24 MB
-
 Aubrey Hall profile 1920s.png 1,968 × 2,646; 6.18 MB
-
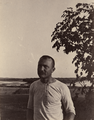
 Aubrey Hall's outfit on Stuart Street, Carnarvon (cropped).png 4,932 × 2,652; 15.2 MB
-
 Aubrey Hall's outfit on Stuart Street, Carnarvon (full).png 5,312 × 3,051; 18.09 MB
-
 Aubrey Hall's outfit on Stuart Street, Carnarvon (verso).png 5,392 × 3,196; 23.12 MB
-
 Aubrey Hall, Cossack (cropped).png 1,856 × 2,372; 5.33 MB
-
 Aubrey Hall, Cossack (full).png 2,080 × 3,030; 6.94 MB
-
 Aubrey Hall, Cossack (verso).png 1,344 × 2,048; 4.04 MB
-
 Aubrey Lamond and Aubrey Hall, Carnarvon (cropped).png 3,400 × 2,532; 10.41 MB
-
 Aubrey Lamond and Aubrey Hall, Carnarvon (full).png 4,609 × 3,240; 15.51 MB
-
 Aubrey Lamond and Aubrey Hall, Carnarvon (verso).png 4,452 × 3,304; 12.82 MB
-
 Baby Joan laughing (cropped).png 3,597 × 2,882; 13.46 MB
-
 Baby Joan laughing (full).png 3,889 × 3,140; 16.14 MB
-
 Baby Joan laughing (verso).png 2,948 × 2,403; 10.59 MB
-
 Barrels and cockpit (crop A).png 1,434 × 975; 1.24 MB
-
 Barrels and cockpit (crop B).png 1,458 × 1,062; 1.12 MB
-
 Barrels and cockpit (crop C).png 1,485 × 1,060; 1.37 MB
-
 Barrels and cockpit.png 4,256 × 2,722; 6.78 MB
-
 Bathing in the big tank on Perret's plantation, Carnarvon (cropped) 01.png 2,490 × 1,263; 4.25 MB
-
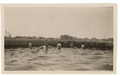 Bathing in the big tank on Perret's plantation, Carnarvon (full).png 2,752 × 1,744; 5.9 MB
-
 Bathing in the big tank on Perret's plantation, Carnarvon (verso).png 2,806 × 1,704; 6.12 MB
-
 Bill Byron at his camp (cropped).png 4,728 × 2,712; 14.34 MB
-
 Bill Byron at his camp (full).png 5,208 × 4,081; 22.88 MB
-
 Bill Byron at his camp (verso).png 2,600 × 2,005; 6.35 MB
-
 Bill Byron doc p1 recto.png 6,560 × 8,591; 77.93 MB
-
 Bill Byron doc p1 verso.png 6,568 × 8,686; 77.7 MB
-
 Bill Byron doc p2 recto.png 6,576 × 8,056; 75.87 MB
-
 Bill Byron doc p2 verso (cropped).png 1,988 × 552; 1.69 MB
-
 Bill Byron doc p2 verso.png 6,664 × 8,024; 75.69 MB
-
 Bill Byron doc p3 recto.png 6,616 × 8,591; 82.05 MB
-
 Bill Byron doc p3 verso.png 6,648 × 8,591; 82.5 MB
-
 Bill Byron HMW163, cropped.png 2,896 × 4,560; 16.26 MB
-
 Bill Byron HMW163, verso.png 1,656 × 2,606; 5.26 MB
-
 Bill Byron HMW163.png 3,176 × 4,984; 19.03 MB
-
 Bill Byron in uniform (back).png 5,684 × 8,752; 70.15 MB
-
 Bill Byron in uniform (cropped).png 5,359 × 8,006; 49.73 MB
-
 Bill Byron in uniform.png 5,738 × 8,867; 57.97 MB
-
 Bill Byron materials.jpg 4,000 × 3,000; 3.94 MB
-
 Blow hole (cropped).png 3,760 × 2,492; 11.48 MB
-
 Blow hole (full).png 4,264 × 2,967; 13.83 MB
-
 Blow hole (verso).png 3,115 × 4,352; 8.14 MB
-
 Blow hole, blank verso (cropped).png 3,740 × 2,308; 10.75 MB
-
 Blow hole, blank verso (full).png 4,224 × 3,051; 14.42 MB
-
 Blow hole, blank verso (verso).png 4,432 × 3,255; 5.71 MB
-
 Boring at Wooramel (verso).png 1,408 × 1,857; 2.51 MB
-
 Boring at Wooramel.jpg 2,160 × 2,852; 1.13 MB
-
 Boring at Wooramel.png 2,504 × 3,164; 9.21 MB
-
 Bride and bridesmaids at Margaret and Peter's wedding, back.png 4,010 × 3,003; 15.02 MB
-
 Bride and bridesmaids at Margaret and Peter's wedding.png 2,860 × 3,799; 14.41 MB
-
 Bridge over dry riverbed (verso).png 1,288 × 933; 947 KB
-
 Bridge over dry riverbed.png 3,360 × 2,445; 7.69 MB
-
 Burton, the car, CB, Onslow 1938 (cropped).jpg 3,633 × 2,169; 1.33 MB
-
 Burton, the car, CB, Onslow 1938 (verso).png 1,632 × 990; 1.58 MB
-
 Burton, the car, CB, Onslow 1938.png 4,232 × 2,573; 11.54 MB
-
 C.M. Wilson, extract of birth certificate, 1937-10-12.png 1,834 × 1,638; 2.69 MB
-
 Camel team in Carnarvon (verso).png 1,540 × 1,112; 930 KB
-
 Camel team in Carnarvon.png 3,431 × 2,472; 8.08 MB
-
 Card from Joy to Jopeham, back.png 2,136 × 3,696; 11.1 MB
-
 Card from Joy to Jopeham, inside cropped.png 1,744 × 2,332; 6.28 MB
-
 Card from Joy to Jopeham, inside detail.png 3,751 × 671; 3.76 MB
-
 Card from Joy to Jopeham, inside.png 3,998 × 4,119; 24 MB
-
 Card from Joy to Jopeham.png 2,166 × 3,702; 12.77 MB
-
 Carnarvon car negative (inverted and cropped for people).png 1,977 × 1,207; 3.43 MB
-
 Carnarvon car negative (inverted and cropped).png 5,164 × 2,931; 21.64 MB
-
 Carnarvon car negative.png 5,757 × 3,368; 24.72 MB
-
 Carnarvon Convent 1927-28 (back).png 2,953 × 1,875; 5.49 MB
-
 Carnarvon Convent 1927-28 (cropped).png 9,227 × 5,632; 57.54 MB
-
 Carnarvon Convent 1927-28 (full).png 9,760 × 6,176; 66.25 MB
-
 Carnarvon Convent 1927-28 (legend).png 11,532 × 6,727; 115.78 MB
-
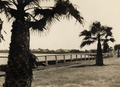 Carnarvon Fascine (cropped).png 3,432 × 2,476; 10.36 MB
-
 Carnarvon Fascine (full).png 3,856 × 3,052; 13.13 MB
-
 Carnarvon Fascine (verso).png 2,536 × 1,973; 7.29 MB
-
 Carnarvon Fascine to the south (cropped, rotated).png 4,273 × 2,404; 13.03 MB
-
 Carnarvon Fascine to the south (full).png 5,224 × 3,414; 18.61 MB
-
 Carnarvon Fascine to the south (verso).png 5,072 × 3,435; 21.77 MB
-
 Carnarvon Fascine, in front of 113 Olivia Tce (cropped).png 2,484 × 1,374; 4.57 MB
-
 Carnarvon Fascine, in front of 113 Olivia Tce (full).png 2,795 × 1,664; 5.74 MB
-
 Carnarvon Fascine, in front of 113 Olivia Tce (verso).png 2,774 × 1,704; 6.67 MB
-
 Carnarvon Fascine, Pat Donegan (cropped, rotated).png 4,660 × 2,496; 13.57 MB
-
 Carnarvon Fascine, Pat Donegan (full).png 4,978 × 3,184; 16.53 MB
-
 Carnarvon Fascine, Pat Donegan (verso).png 3,303 × 2,184; 10.65 MB
-
 Carnarvon from the air, 1930s (cropped).png 3,936 × 1,892; 8.78 MB
-
 Carnarvon from the air, 1930s (full).png 4,496 × 3,236; 15.63 MB
-
 Carnarvon from the air, 1930s (verso).png 3,056 × 2,162; 3.52 MB
-
 Cars crossing a dry riverbed (cropped).jpg 1,992 × 1,820; 443 KB
-
 Cars crossing a dry riverbed (verso).png 904 × 1,232; 960 KB
-
 Cars crossing a dry riverbed.png 2,264 × 3,225; 6.68 MB
-
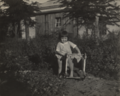
 Child near fence (full).png 3,104 × 5,384; 20.94 MB
-
 Child near fence (verso).png 1,032 × 1,864; 2.3 MB


.png)


.png)


.png)
.png)
.png)
.png)
.png)

.png)
.png)
.png)

.png)
.png)


.png)
.png)

.png)
.png)
.png)
.png)
.png)
.png)
.png)
.png)

.png)
.png)
.png)
.png)
.png)
.png)
.png)
.png)
.png)
.png)
.png)
.png)
.png)
.png)

.png)
.png)
.png)


.png)
.png)
.png)


.png)


.png)
.png)
.png)
.png)
.png)
.png)
.png)
.png)
.png)
.png)
.png)
.png)
.png)
.png)
.png)

_01.png)
.png)
.png)
.png)
.png)
.png)


.png)
.png)


.png)
.png)
.png)
.png)


.png)

.jpg)
.png)


.png)


.png)
.png)

.png)
.png)
.png)
.png)
.png)
.png)
.png)
.png)
.png)
.png)
.png)
.png)
.png)
.png)
.png)
.png)
.png)
.png)
.png)
.jpg)
.png)

.png)
.png)
.png)
.png)
.png)
.png)