Category:The Illustrated London News 1879

Media in category "The Illustrated London News 1879"
The following 69 files are in this category, out of 69 total.
-
 ILN 1879, p. 463.jpg 1,465 × 2,165; 657 KB
-
 ILN 1879, p. 464.jpg 2,165 × 1,465; 677 KB
-
 ILN 1879, p. 465.jpg 1,465 × 2,165; 393 KB
-
 Bay and Town of Funchal, Madeira, ILN 1879 (coloured).jpg 512 × 257; 44 KB
-
 Bay and Town of Funchal, Madeira, ILN 1879.jpg 1,952 × 1,008; 331 KB
-
 ILN 1879, p. 468.jpg 2,165 × 1,465; 364 KB
-
 ILN 1879, p. 469.jpg 1,465 × 2,165; 432 KB
-
 Afgwomen.png 1,310 × 962; 1.42 MB
-
 Agamemnon 1879.png 784 × 595; 581 KB
-
 Ahin Posh stupa view by William Simpson, Illustrated London News August 16, 1879.jpg 1,680 × 1,258; 1.53 MB
-
 An old Afghan man sits with a woman and child on the ground Wellcome V0019237.jpg 3,016 × 2,404; 3.96 MB
-
 Battle of Futtehabad.jpg 1,035 × 714; 237 KB
-
 Chelmsfords-return-l.jpg 1,500 × 1,052; 354 KB
-
 Comus ILN2.JPG 680 × 460; 74 KB
-
 Dabulamanzi, crop.jpg 521 × 561; 183 KB
-
 Dabulamanzi.jpg 918 × 1,200; 447 KB
-
 Damageshuascar.JPG 614 × 615; 50 KB
-
 Drilling the 12th Khelat-I-Ghilzies in the lines at Mooltan - ILN 1879.jpg 1,070 × 736; 587 KB
-
 Execution of a Ghazi, or Mohammedan fanatic at the peshawur Wellcome V0041834.jpg 2,475 × 3,095; 4.19 MB
-

-
 Gingidlovu-2 (cropped to cutlass bayonets).jpg 142 × 194; 7 KB
-

-
 HMS Thunderer Gun Explosion.png 648 × 427; 289 KB
-

-
 Inside the laager at Ginghilovo during the Zulu attack.jpg 800 × 567; 86 KB
-
 Kambula 1.jpg 1,050 × 751; 276 KB
-
 Lawn tennis drawing, newspaper, around 1879.jpg 1,922 × 2,806; 2.49 MB
-

-
 Map of Lord Chelmsford's Route to the Relief of Ekowe, &c (cropped).jpg 2,644 × 3,066; 629 KB
-
 Map of Lord Chelmsford's Route to the Relief of Ekowe, &c.jpg 4,128 × 5,984; 1.98 MB
-
 Mary Wheatland ILN 1879.jpg 552 × 733; 189 KB
-
 Natal Mounted Police 1879.jpg 607 × 727; 210 KB
-
 Ntombe.jpg 1,752 × 2,233; 2.32 MB
-
 Pictorial Journalism.jpg 4,100 × 5,984; 2.2 MB
-

-
 Rodmans Guns installed in Valparaíso in 1879.png 655 × 423; 714 KB
-
 Sir David Kinloch, Bart.jpg 4,088 × 5,984; 2.41 MB
-
 Sketch of King Yaqub Khan of Afghanistan in 1879-cropped.jpg 1,847 × 2,282; 2.21 MB
-
 Sketch of King Yaqub Khan of Afghanistan in 1879.jpg 2,480 × 3,509; 4.38 MB
-
 The Afghan War, Fort of Dakka, on the Cabul River - ILN 1879.jpg 2,538 × 1,062; 1.7 MB
-

-
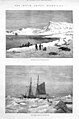 The Dutch Arctic Expedition - ILN-1879-0125-0012.jpg 1,507 × 2,272; 1.55 MB
-
 The final repulse of the Zulus at Ginghilovo - ILN 1879.jpg 2,038 × 1,290; 766 KB
-
 The Illustrated London News, 14 June 1879. p. 561.jpg 4,072 × 5,984; 1.48 MB
-

-
 The International Exhibition Building Sydney.jpg 800 × 485; 146 KB
-
 The late Captain W. R. C. Wynne - The Illustrated London News, 14 June 1879. p. 561.jpg 1,133 × 1,480; 150 KB
-
 The Late Colonel Home, C.B., R.E., &c (cropped).jpg 1,474 × 2,107; 359 KB
-
 The Late Colonel Home, C.B., R.E., &c.jpg 4,104 × 5,984; 2.06 MB
-
 The Late General Peel, &c (cropped).jpg 1,104 × 1,418; 129 KB
-
 The Late General Peel, &c.jpg 4,092 × 5,984; 1.13 MB
-

-
 The Zulu War; Camp of the 13th and 90th Regiments at Eland's Neck, &c.jpg 4,092 × 5,984; 2.12 MB
-
 The Zulu War; Colonel Pearson's Column Crossing the Tugela (1 & 2).jpg 8,376 × 5,984; 7.56 MB
-
 The Zulu War; Colonel Pearson's Column Crossing the Tugela (1).jpg 4,188 × 5,984; 2.12 MB
-
 The Zulu War; Colonel Pearson's Column Crossing the Tugela (2).jpg 4,188 × 5,984; 1.86 MB
-
 The Zulu War; Departure of the 17th Lancers, &c., Colonel Glyn's Force, &c.jpg 4,108 × 5,984; 2.2 MB
-
 The Zulu War; Garrison of Fort Pearson, &c (cropped).jpg 2,958 × 3,638; 1.45 MB
-
 The Zulu War; Garrison of Fort Pearson, &c.jpg 4,096 × 5,984; 2.19 MB
-
 The Zulu War; Maps.jpg 4,100 × 5,984; 2.02 MB
-
 The Zulu War; Officers of the 24th Regiment Killed at Isandula.jpg 4,092 × 5,984; 1.44 MB
-
 The Zulu War; Scene of the Battle of Isandula, &c. (1 & 2).jpg 8,241 × 5,984; 8.09 MB
-
 The Zulu War; Scene of the Battle of Isandula, &c. (1).jpg 4,121 × 5,984; 2.03 MB
-
 The Zulu War; Scene of the Battle of Isandula, &c. (2).jpg 4,120 × 5,984; 2.28 MB
-
 The Zulu War; Sketches at the Victoria Docks on the Departure of the 17th Lancers.jpg 4,092 × 5,984; 2.19 MB
-
 The Zulu War; The Intrenched Position at Rorke's Drift (1 & 2).jpg 8,233 × 5,984; 9.01 MB
-
 The Zulu War; The Intrenched Position at Rorke's Drift (1).jpg 4,116 × 5,984; 2.23 MB
-
 The Zulu War; The Intrenched Position at Rorke's Drift (2).jpg 4,117 × 5,984; 2.49 MB
-
 Tullochgorum Reel in the camp of the 72nd Highlanders, at Kohat ILN 1879.jpg 1,078 × 756; 612 KB


.jpg)


.jpg)


.jpg)


.JPG)


.jpg)

.jpg)


.jpg)
.jpg)
.jpg)

.jpg)


.jpg)
.jpg)
.jpg)

.jpg)
.jpg)
.jpg)

_(cropped).jpg)